The newest release of ArcGIS Pro 2.7 allows users to download the Python library ArcPy, previously only available from within the installation folder. This means the two major ArcGIS Python libraries ArcPy and the ArcGIS API for Python are finally available to use in a code-only environment. Previously, using both of these libraries in a code-only environment was a bit convoluted, either requiring cloning the shipped environment via the ArcGIS Pro GUI, or copy-pasting everything into a separate Anaconda installation’s env folder– –both of which broke during minor releases and up. This is a super great advancement for the stability of scripting environments which are becoming non-negotiable for the modern, data analytics-driven organization. I haven’t seen any tutorials on how to do this yet, so, I figured: why not write my own?

https://pro.arcgis.com/en/pro-app/latest/arcpy/get-started/installing-arcpy.htm
First, you’ll need to download Anaconda, there are a few stipulations that may require the purchase of a commercial package. As of 03/18/2021, those are as follows:
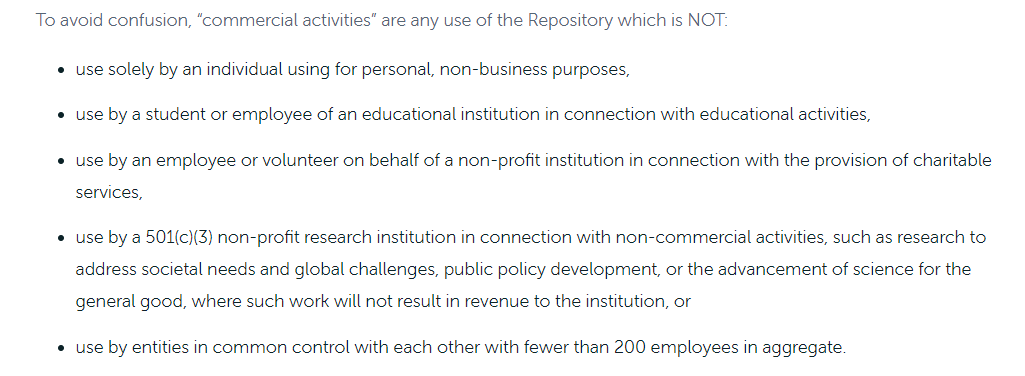
https://www.anaconda.com/terms-of-service
Second, run the Anaconda Prompt as an administrator. There’s an alternative, but this is the way to avoid headaches at new releases of ArcGIS Pro. You’ll enter the following command to create a new environment:
conda create --name whatever_you_want_your_env_called
creating a new environment in conda
Next, we’ll activate our newly created environment using the command:
conda activate hopefully_you_named_your_env_something_shortYou have successfully entered your new environment when the parentheses to the left of the command changes from (base) to (the_name_of_your_environment):

This really is the beauty of Anaconda. You’re able to separate your environments for the purpose they were originally created. Over time a wide variety of libraries can cause the solver to be sluggish as Anaconda tries to figure out which versions of what libraries play nice with other libraries. Package management is a surprisingly tricky problem to get around; generally, less is more when it comes to the number of libraries you push together.
Next! Let’s download ArcPy! We’re going to request the library from Anaconda. Every all the libraries that are available will have a unique method of requesting, sometimes they will come from the Anaconda Forge, and other times they’ll be hosted directly. If you’re wondering how to install your favorite library use a search engine and type:
Anaconda LIBRARY-NAME-HERE
Any result from Anaconda.org will provide a page that shows what command(s) are available to download the library in question. For ArcPy, that page looks like this.
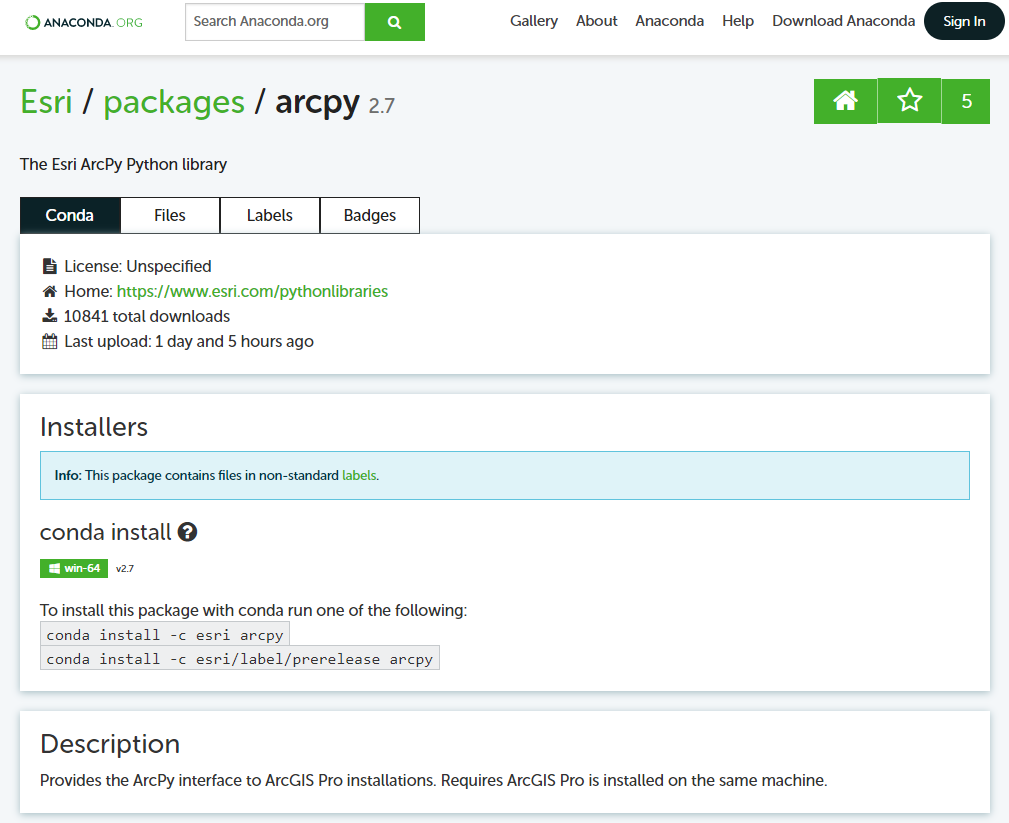
We have two options, let’s choose the top choice and enter it into our administrative Anaconda Prompt:
conda install -c esri arcpy
Alternatively, when you create your environment in a non-administrative Anaconda Prompt will be unable to sync the DLLs that get updated with the new releases of ArcGIS Pro. This will cause an error in your system and you’ll be unable to use ArcPy. If you do not have access to administrator credentials, then you will either remove or upgrade ArcPy at each minor release or greater.
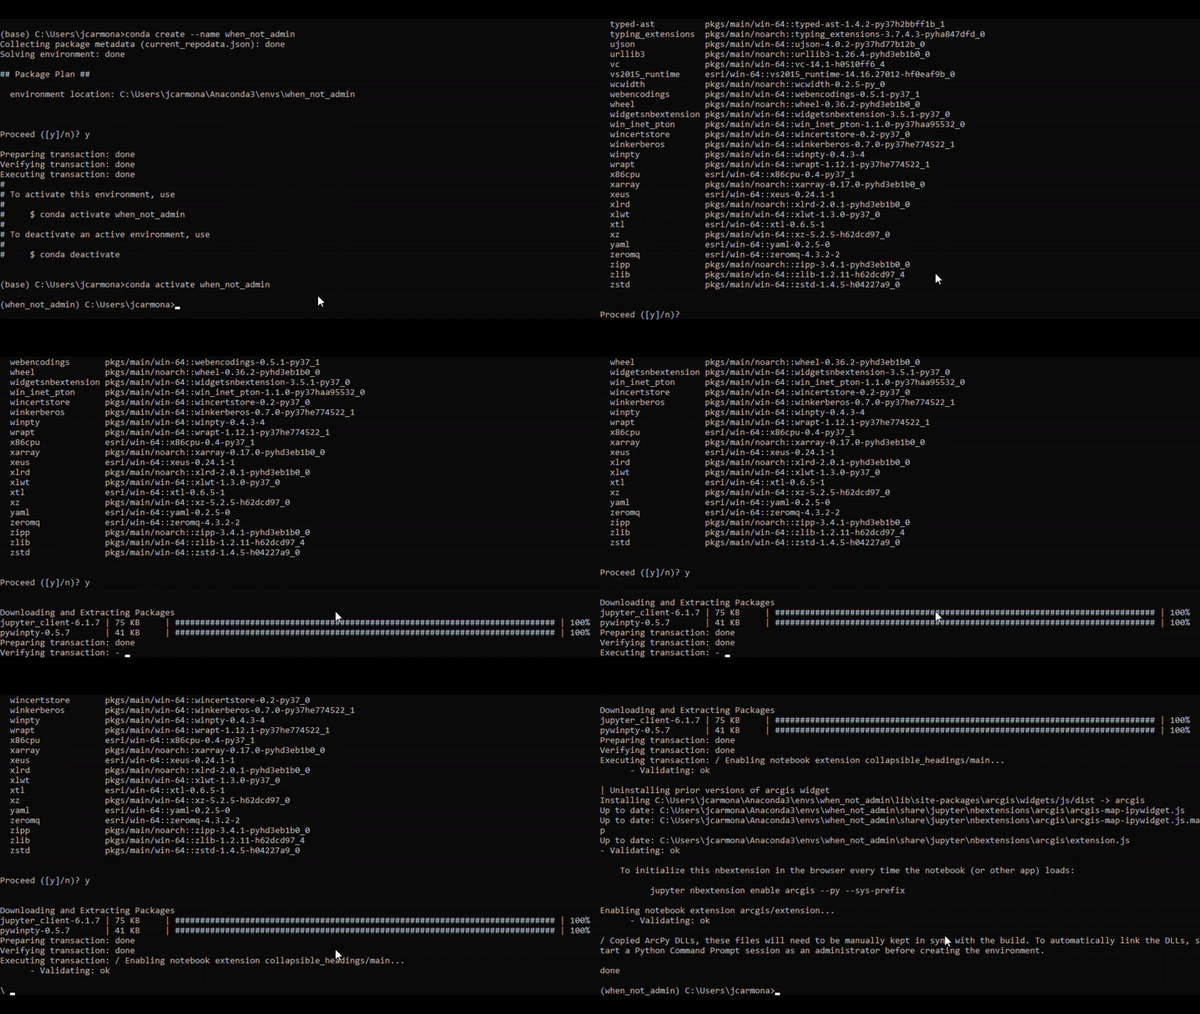

So there! The hard part is over. At least the confusing part. Everything else can, and should, be done in a non-administrative Anaconda Prompt shell. The ArcGIS API for Python (arcgis) will be installed as well, it is listed below for reference. In turn, enter the following commands to unlock all the up-to-date Esri good-ness. After each line, the solver will work its magic and ask for a simple y/n to proceed. This process can take a minute or more per library depending on the complexity of the interdependencies.
conda upgrade arcpy
conda install arcgis
conda upgrade arcgis
conda install geopandas
Geopandas is a great addition as it also comes with the Fiona, Shapely, and PyProj libraries.
Now we can run a simple test to make sure everything is working correctly. The caveat for using ArcPy is the need to have ArcGIS Pro installed on your machine and meeting one of the following conditions:
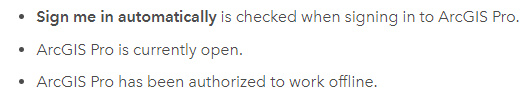
[https://pro.arcgis.com/en/pro-app/latest/arcpy/get-started/installing-arcpy.htm]
On my machine, I’m signed in automatically and also have a gist to keep servers signed in as well. Let’s test it! We’ll open Python through the command line and import ArcPy– –if all goes well we won’t see any errors and the next line will appear.
pythonimport arcpy
That’s it! As a bonus, we can export our environment to re-use elsewhere or to keep multiple workspaces synced together. This is done via a .yml file and will be necessary if you don’t have access to the administrative Anaconda Prompt.

You’ll copy the output, enter it into your text editor of choice, and save the file as a .yml. Keep this file updated as you update your environment.
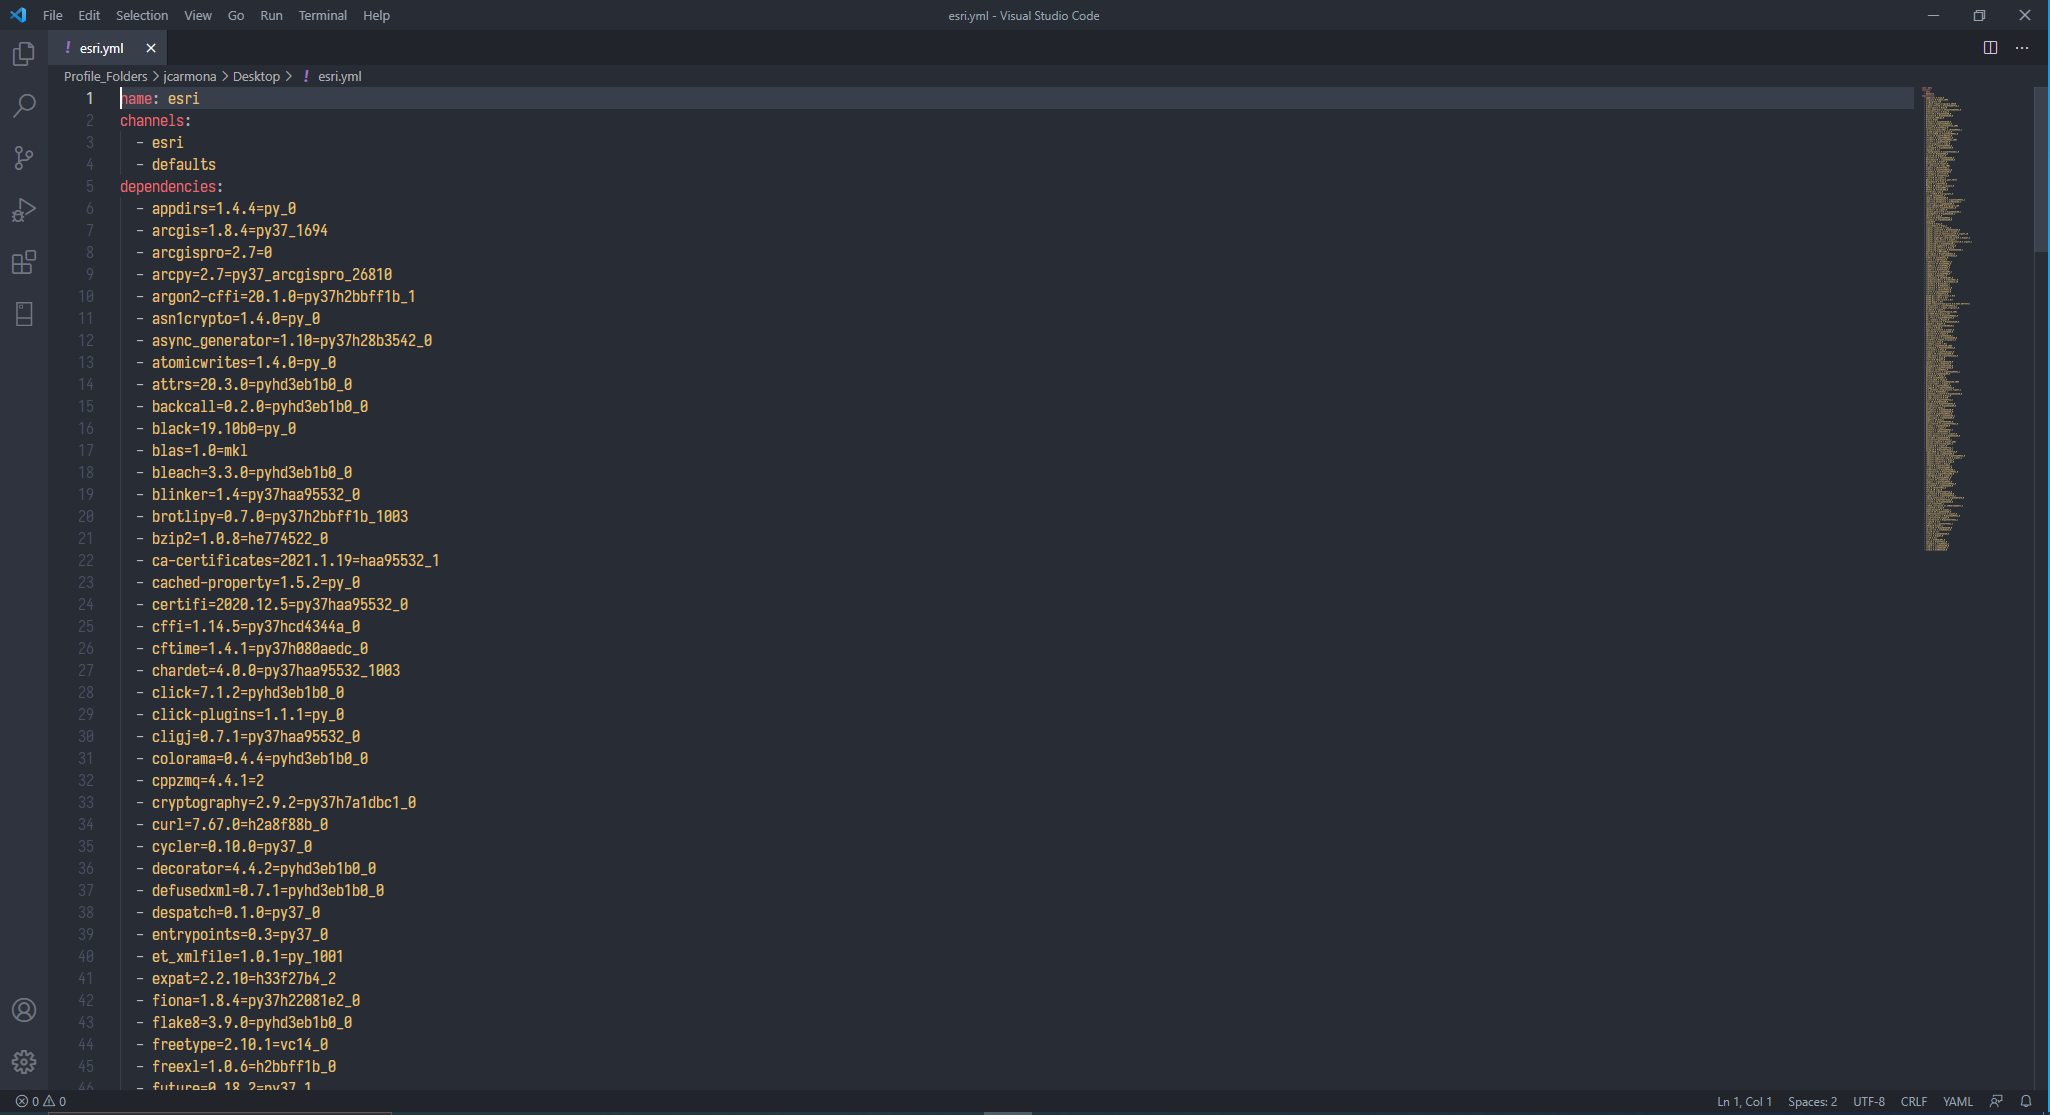
Now you can re-create this environment using the command:
conda env create -f thenameofyourfile.ymlIn Closing

This latest release really is a watershed moment for creating stable business systems that are programmatically managed. Different environments can be deployed allowing a greater degree of customization in terms of feature enrichment, data cleansing, and the sundry extract-transform-load chores that define the modern enterprise. Honestly, I’m totally stoked. Too many times I’ve held off on major upgrades because of the labor involved with recreating my Python environment. Hopefully, this clears up any confusion for those uninitated with managing Anaconda environments. If you have any questions feel free to ask!, or check out Anaconda’s excellent documentation!