The less sensational title might be:
ArcPy Minor Upgrades are a Minor Headache.
Two years ago I wrote a long article on how to create a standalone ArcPy environment; normally, I’d say it is worth a read but its probably out of date. I’ve seen a few more articles since then covering the same subject matter so I’m hoping that this a more common practice. Why am I writing this? Yesterday, Esri released a new minor update to ArcGIS Pro from 3.1.x to 3.2.0 and judging from the What’s New page this is one of the more feature-rich releases to the software since 2.7.x.
https://pro.arcgis.com/en/pro-app/latest/get-started/whats-new-in-arcgis-pro.htm
With a new minor release comes new binaries, meaning that any Conda environments created within the ArcGIS Pro GUI or ArcPy installations created in a standalone fashion need to be freshly installed. You’ll know if this happens when you see an error like this:
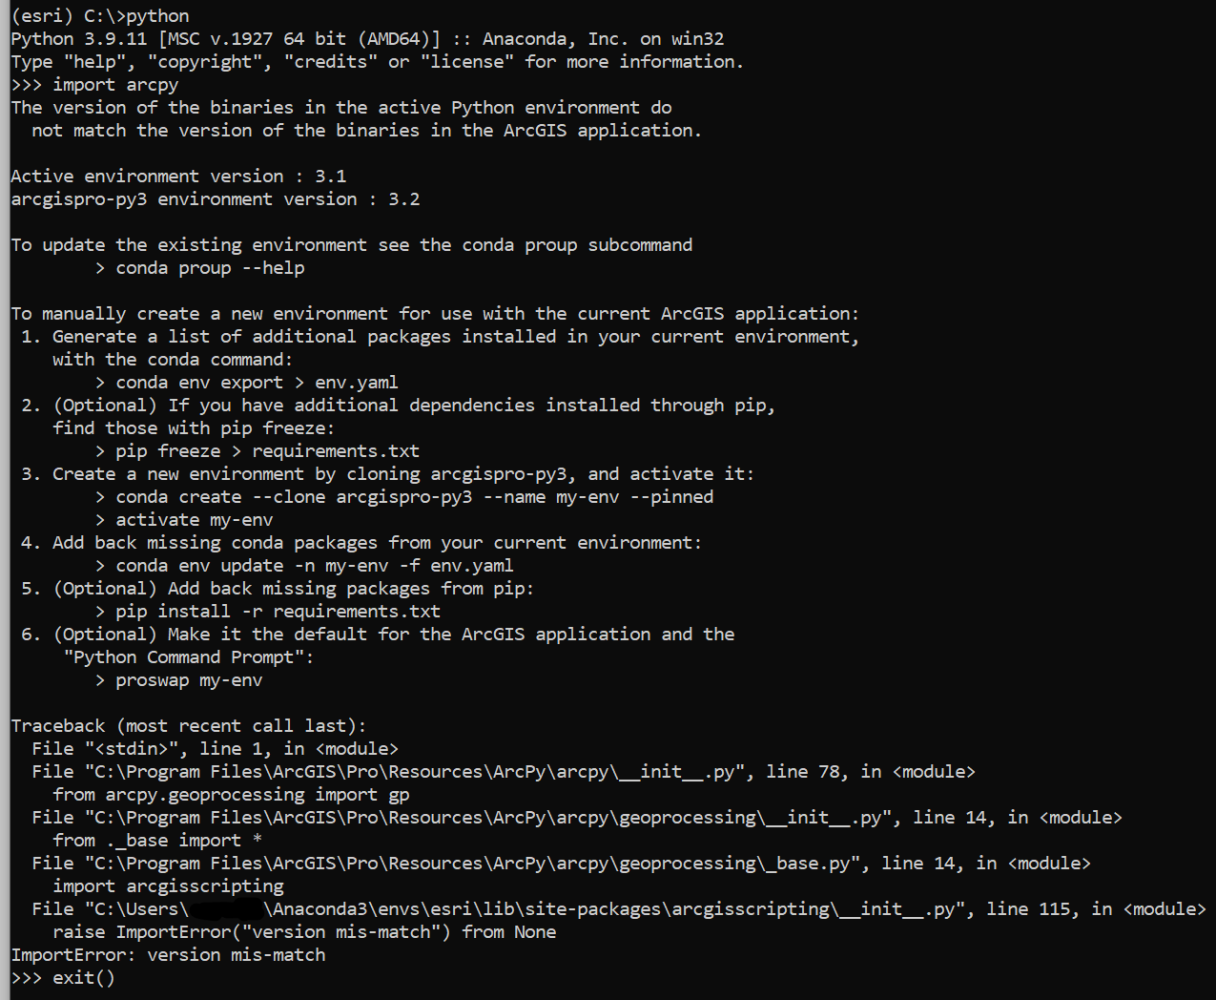
Normally one could just run a command like:
conda update some-libraryBecause of the binary situation above, this does not work with the ArcPy library. We have two options for removing and re-installing ArcPy which I’ll cover. Esri has a convenience feature for “upgrading” your ArcPy environment; however, the actual mechanism works like this:
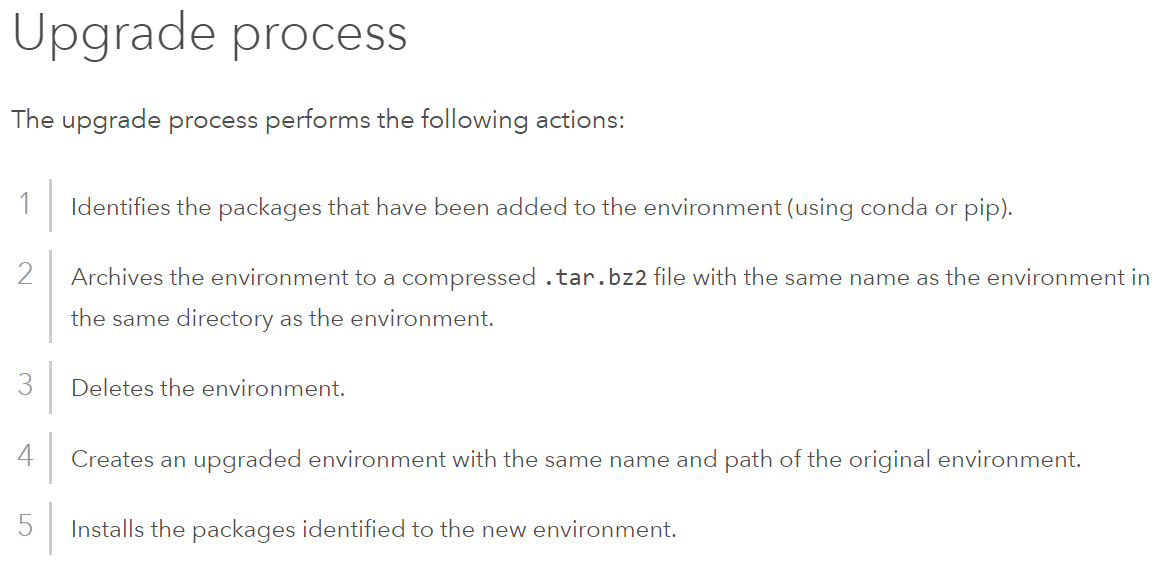
If you are using ArcPy in a standalone kernel for Python, and you have, or are planning to, install the new minor release update (3.2) to ArcGIS Pro you will need to reinstall ArcPy in your Conda environment. Let’s look at a few options that you have for performing the reinstall; we’ll imagine a few different scenarios.
Scenario 0 - You Can do a Standalone Installation of ArcPy!?
Yes. It’s super easy and this is how I do it! From an Anaconda prompt window, we’ll do the following using the placeholder ENV_NAME for the name of your standalone Conda environment. Feel free to name it whatever you like.
conda create -n ENV_NAME
conda activate ENV_NAME
conda install -c esri arcpy
The first line creates the environment, you’ll need to press the “y” key and then the “enter” key to complete the installation. The second line will activate this new environment. The third line installs ArcPy and all of its related packages into it, this also includes the ArcGIS API for Python.
Scenario 1 - A Simple Scenario
I just installed ArcPy and nothing else. Congratulations! You can remove and re-install ArcPy without thinking about it too hard.
conda deactivate ENV_NAME
conda remove -n ENV_NAME --all
conda install -c esri arcpy
The first line deactivates your environment if it is open already. The second line removes all packages. The last line will reinstall ArcPy. That’s it, your environment will continue to work as expected and won’t break any of your scheduled tasks if you had them written against the python.exe path within your kernel.
Scenario 2 - I, uh, Installed a Few Other Packages
This doesn’t surprise me. Anaconda is a package manager. You use it to manage packages. You like to dabble in GeoPandas and other libraries of substance. Me too. If you know exactly what you’re looking for, you can trawl through a .yaml file:
conda activate ENV_NAME
cd "some path where you want the exported file"
conda env export > some_file_name.yml
The ArcPy library has a lot of dependencies so browsing it like this isn’t really my cup of tea. Although, a .yaml is a great way to share your environment with someone else. I think an easier way to look at your package installations is to look at your revision history. This is Anaconda’s version control, when you access it, the output is a numbered list of the libraries and their versions installed at each command:
conda activate ENV_NAME
conda list --revisions
This batched version of downloads should help you to figure out which libraries you downloaded (and in what order) so you have a better idea of how you need to re-create your environment. ArcPy is normally the first install I make after creating the environment, so I rolled back my environment and then re-installed ArcPy like this:
conda install --revision 0
conda install -c esri arcpy
Your syntax will likely be different depending on the number if libraries you need to include and in what order of installation those happened.
And it’s kind of that easy. Admittedly, not as easy as upgrading a library with the update command but such is the life of a licensed software library.